By default, each operating system such as Microsoft Windows or macOS uses its own set of mouse cursor styles. However, if you find yourself bored with the default cursor styles, you can easily change them by following the steps below:
- First, find and download a preferred mouse cursor style. You can search on Google, GitHub or browse through beautiful cursor designs shared by designers on Deviantart.
You can also find some stunning cursor designs here. - Next, extract the downloaded cursor file and right-click on the file. Then, select "Install" to install the new cursor file into Windows.
- Any mouse cursor changes can be applied immediately. If your cursor hasn't changed yet, you can select Cortana (the search box) >> Type: Change the mouse pointer display or speed >> Pointer >> Choose the item you just installed into Windows and click on Apply >> OK.


Note: In cases where it is not possible to install the new mouse cursor file and the "Install" option is not available. If the extracted file is not in the .ani format, the "Install" option will not be available when right-clicking on the file. Therefore, we cannot directly install it into Windows, and instead, we need to install it manually.
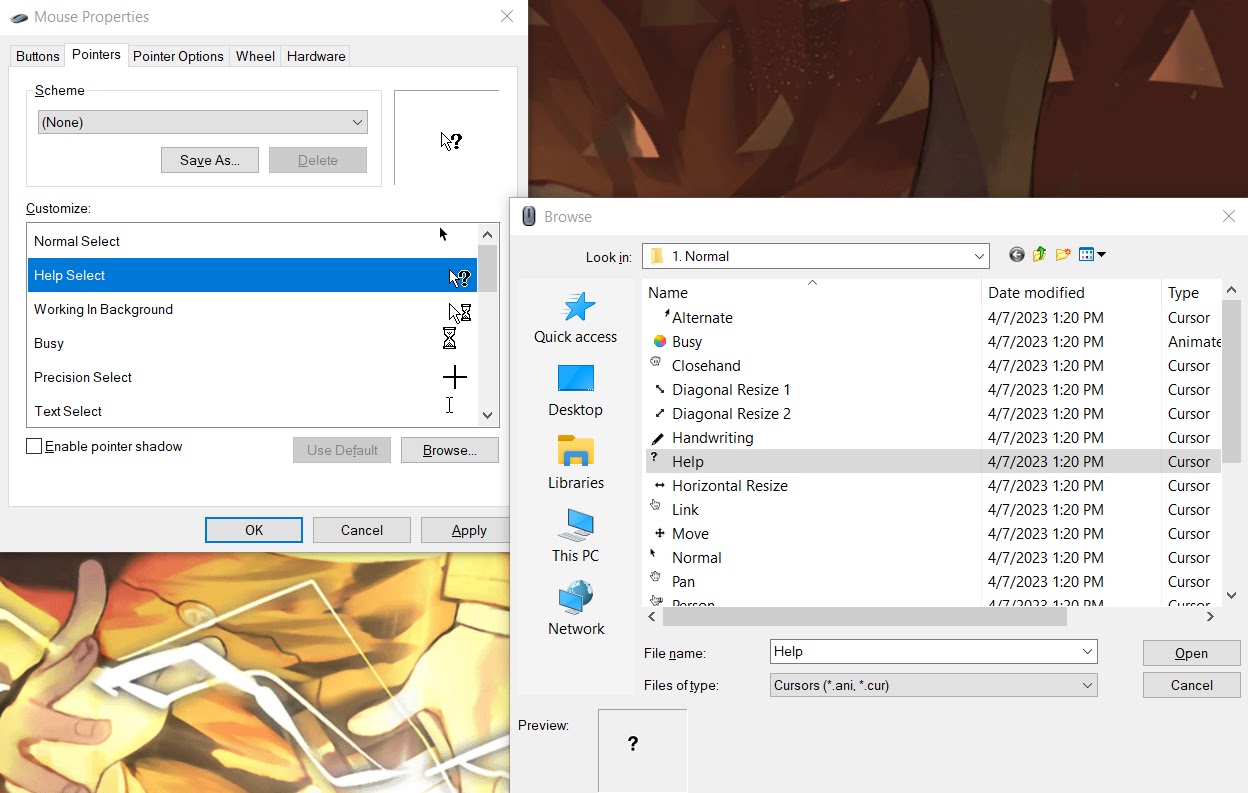
- Type in Cortana >> Change the mouse pointer display or speed >> Pointer >> Scheme. In the Pointer window, the Scheme section will display the name of the default cursor file, usually "Windows Default (system scheme) ".
- Here, you select "None" in the Scheme section, and then proceed to install each new cursor to replace the default cursor by changing each item one by one. (image)
- Click Apply >> OK.


Note: After changing the cursors, it is recommended to save the cursor file (Save As) as "filename" so that after restarting the computer, the mouse cursor won't be reset, and you can switch between multiple custom styles.